When working with Microsoft Fabric, users often need to manage and transfer various items, such as notebooks, reports or pipelines between workspaces. Whether it’s due to changes in organizational structure, project reorganization, or simply the need to centralize resources, knowing how to move Fabric items from one workspace to another is an essential skill for anyone working with the platform.
In this post, we’ll explore why you might need to move items between workspaces in Microsoft Fabric, and provide you with a clear step-by-step guide on how to do it efficiently.
If you want to become a more productive Tech Worker, make sure you buy my book on Amazon:
Why Move Items from One Fabric Workspace to Another?
There are several reasons why you might want to migrate Fabric items from one workspace to another:
- Organizational Changes: As teams evolve and reorganize, items might need to be relocated to different workspaces for better management and access control.
- Project Migration: If a project or task has been completed and another team needs access to its resources, moving notebooks, datasets, or reports ensures smooth continuity.
- Consolidation of Resources: For easier collaboration, you might want to centralize certain resources from different workspaces into one, so your team has all the necessary tools in a single location.
- Access Control and Permissions: You may need to move resources to a workspace with more appropriate security settings and access controls, especially if data privacy is a concern.
- Optimization of Workspace Utilization: If a workspace is becoming too cluttered or overutilized, moving specific items to another workspace can help maintain performance and organization.
- Testing Purposes: If you have a workspace that you use for testing, you might want to migrate items to/from this workspace.
Migrating Fabric Items from One Workspace to Another
Now that we understand why someone might want to move Fabric items from one workspace to another, let’s walk through the steps to do it.
Step 1: Identify the Items to Move
Before transferring items, take time to assess what needs to be moved. Common items that you might want to migrate in Microsoft Fabric include:
- Notebooks: These contain your scripts and transformations.
- Datasets: If you’re working with data stored in a workspace, you may need to move it to another workspace for further processing.
- Reports: Visualizations and business intelligence reports created in one workspace may need to be transferred to another.
- Dataflows and Pipelines: These automate data transformations, and you may want to move them to another workspace for organizational purposes.
Step 2: Prepare the Destination Workspace
Before moving items, make sure the destination workspace is ready. This includes ensuring that the necessary permissions are in place, such as access control for users in the new workspace. You’ll also need to make sure that the required infrastructure (e.g., storage, data connections) exists in the destination workspace. Also, make sure you prepare a logical folder structure for these new items.
Step 3: How to Move Fabric Items from One Workspace to Another?
In this example, we will move a Fabric Notebook from one Workspace to another. There are two possible ways to do this:
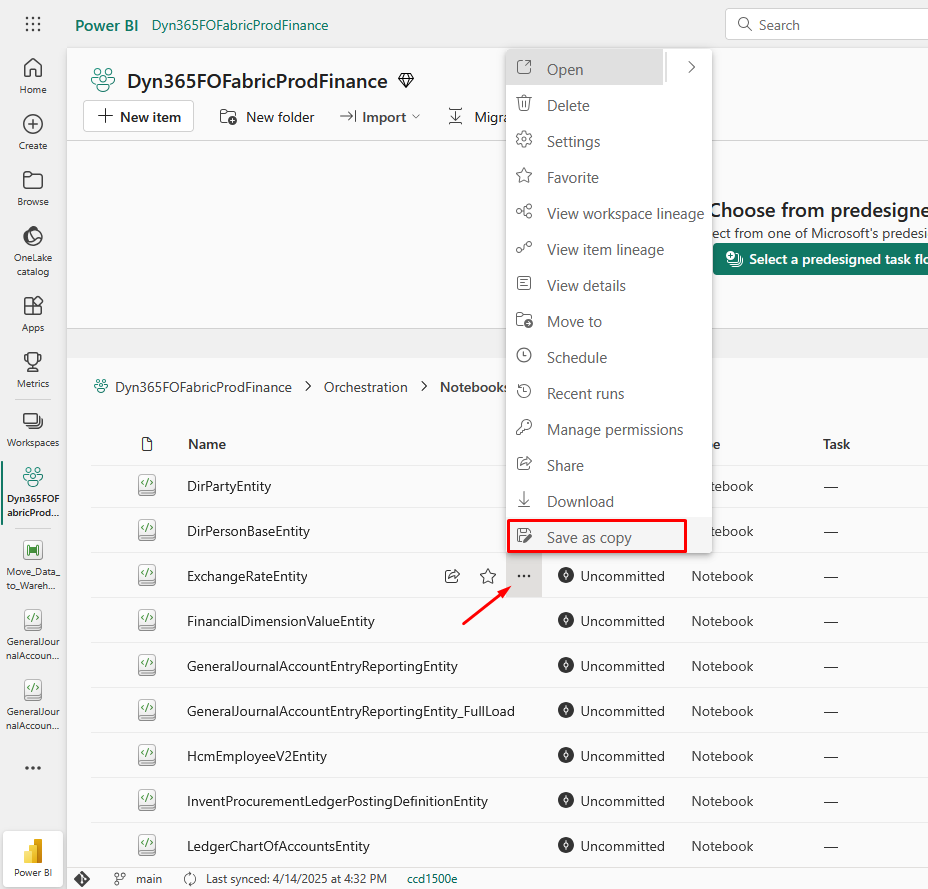
Save as copy:
First option is to find the notebook you would like to move, and click on Save as copy:
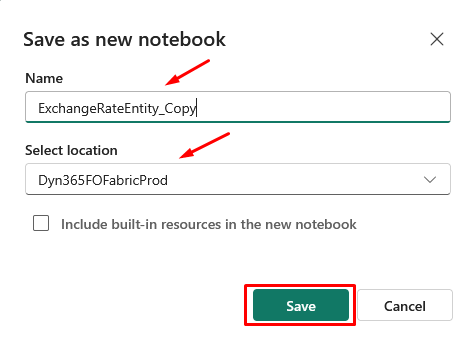
Type in the name of the new notebook and select the new workspace to which you want to move the Fabric Notebook. Click Save:
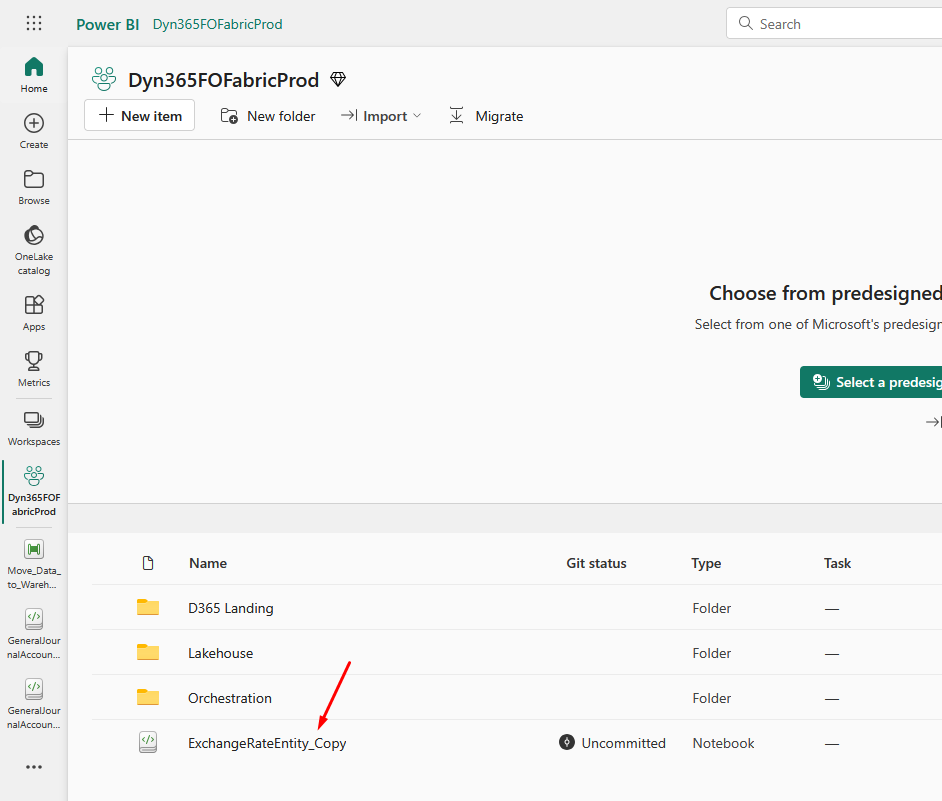
Have in mind that this option will move the notebook to the root folder of another workspace:
Download and import:
Next way to migrate a Fabric notebook to another workspace is to download it and import into another workspace. Select three dots next to your notebook and click on Download:

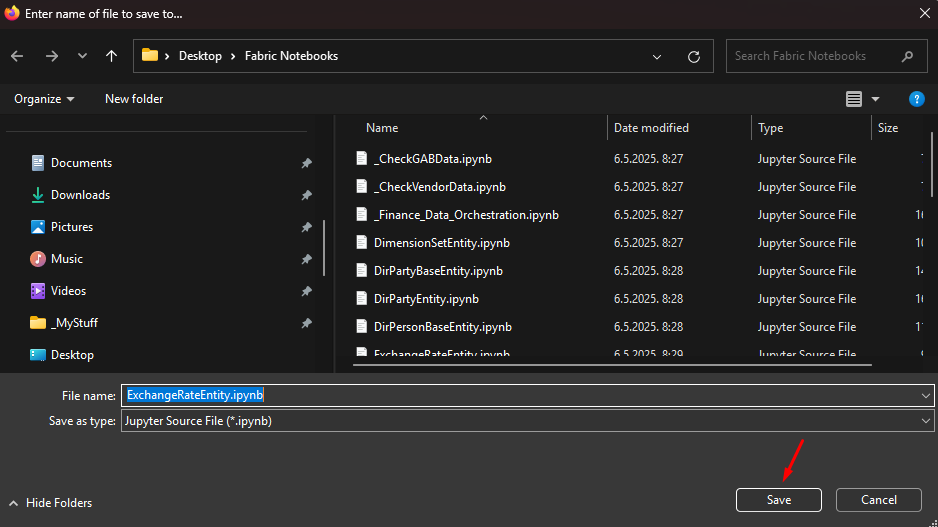
Save the .ipynb file to your desired location:
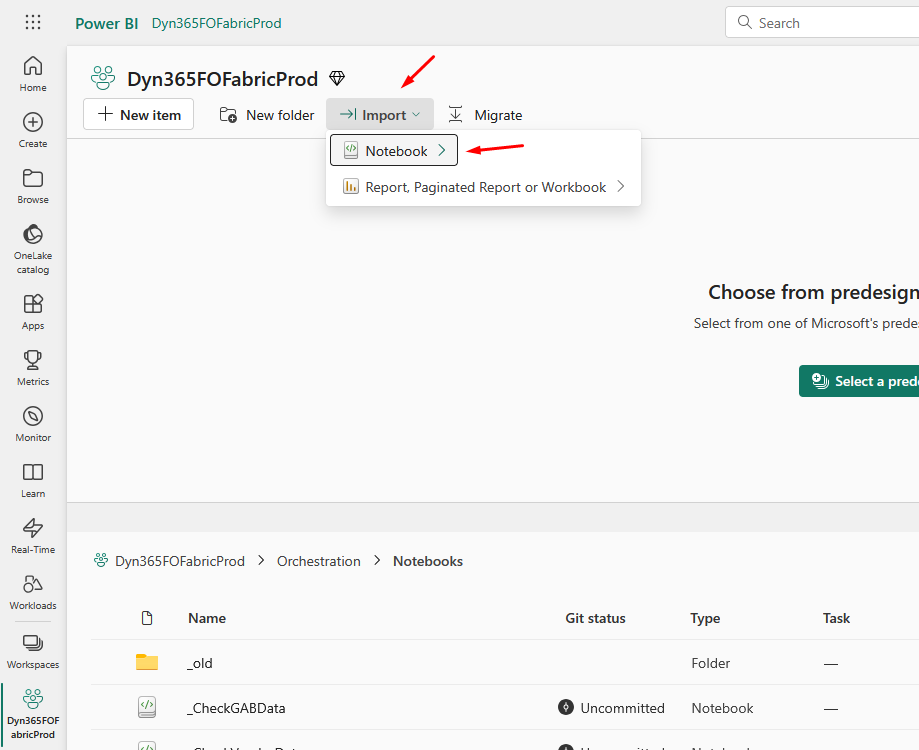
Go to the Workspace (and Folder) where you want to import the notebook and click on Import > Notebook > From this computer:
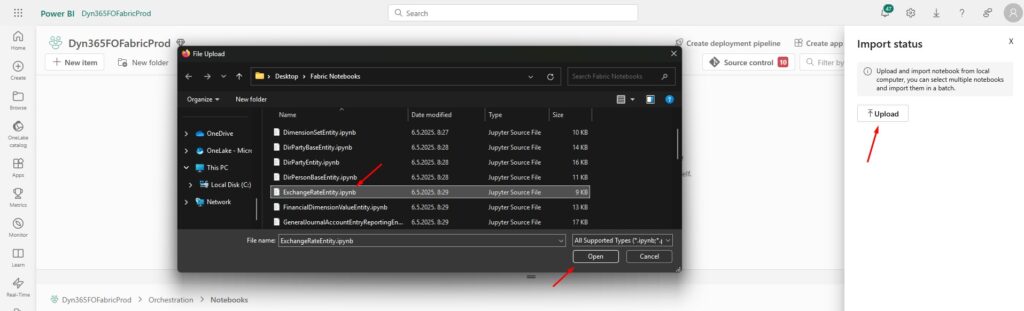
Click on Upload and select the file that you want to import:
Make sure you change the data items you want to use with this Fabric Notebook (if needed).
Test the Moved Items
Once you’ve moved your resources, it’s important to verify that everything is functioning correctly in the new workspace. Check that datasets are properly linked, reports load correctly, and notebooks run without issues. Testing ensures that your move was successful and that users have access to the necessary resources.
Tips for a Smooth Migration Process
- Backup First: Always create backups before migrating any items, especially critical resources like reports or datasets. This ensures you don’t lose any important data.
- Check Permissions: Ensure that users in the destination workspace have appropriate permissions to access the items you’ve moved.
Conclusion
In this post, we’ve covered how to move Fabric items from one workspace to another, including why you might need to do it and the steps involved. Whether you’re migrating notebooks, reports, or pipelines, Microsoft Fabric provides the flexibility to transfer resources between workspaces with minimal hassle.
Remember that migration is a process that involves planning, preparation, and testing to ensure smooth transitions. By following these guidelines, you can easily reorganize your resources, streamline your workflows, and ensure that your team has the right tools in the right workspace.
If you want to learn more about Microsoft Fabric Workspaces, make sure you check out this link. There is also a great book on Amazon called Learn Microsoft Fabric: A practical guide to performing data analytics in the era of artificial intelligence that covers some interesting topics.